

从Loongnix Server镜像站点下载 ISO 镜像时,同下载路径将有一个同名的 .md5 文件,该文件内容为 ISO 镜像的 sha256sum 值。为了避免网络原因或者存储设备原因出现下载不完整的问题,请务必在下载 ISO 镜像之后核对文件校验值是否一致!
如果您有高速网络和 DVD 刻录机,可以选择从 Loongnix Server 镜像站点下载 Loongnix Server 系统镜像,然后使用 Windows/Linux 系统刻录工具刻录镜像(推荐 Loongnix Server 自带刻录工具 brasero)。
大多数计算机能够从 USB 设备启动,因此您也可以从 USB 盘(小闪存盘)安装 Loongnix Server 系统。如果您有高速网络和大于 6G 的 U 盘,可以选择从 Loongnix Server 镜像站点下载系统镜像,然后使用 Windows/Linux 制作镜像工具制作,Loongnix Server 系统可启动终端,使用 dd 命令进行镜像制作。
镜像制作命令示例:
dd if=镜像文件地址 of=/dev 下识别的U盘设备 bs=8M && sync
以 Loongnix Server 8.4.0 镜像制作举例:
镜像文件为:/home/loongson/Loongnix-server-8.4.0.livecd.loongarch64.iso系统下识别的U盘设备: /dev/sdb (可通过fdisk -l或者lsblk命令查看)镜像制作命令:dd if=/home/loongson/Loongnix-server-8.4.0.livecd.loongarch64.iso of=/dev/sdb bs=8M && sync
本节介绍 PXE 安装方式,并介绍相应的安装步骤,指导用户进行安装。
PXE(Pre-boot Execution Environment)是由 Intel 公司开发的一项便捷安装操作系统的技术。PXE 工作于 Client/Server 的网络模式,支持工作站通过网络从远端服务器下载映像(images),并由此支持通过网络启动操作系统,在启动过程中,终端要求服务器分配 IP 地址,再用 TFTP 或 MTFTP 协议下载一个启动软件包到本机内存中执行,由这个启动软件包完成终端基本软件设置,从而引导预先安装在服务器中的终端操作系统。
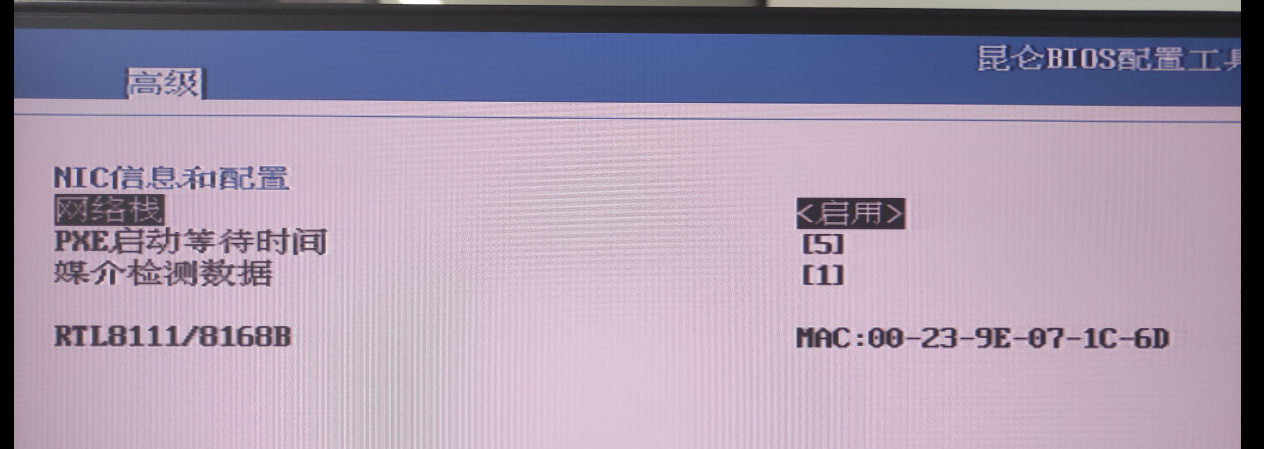
要使用 PXE 安装,需要固件支持 PXE 启动模式,安装之前需要确认固件是否支持 PXE 启动,昆仑 BIOS 支持 PXE 启动如下图: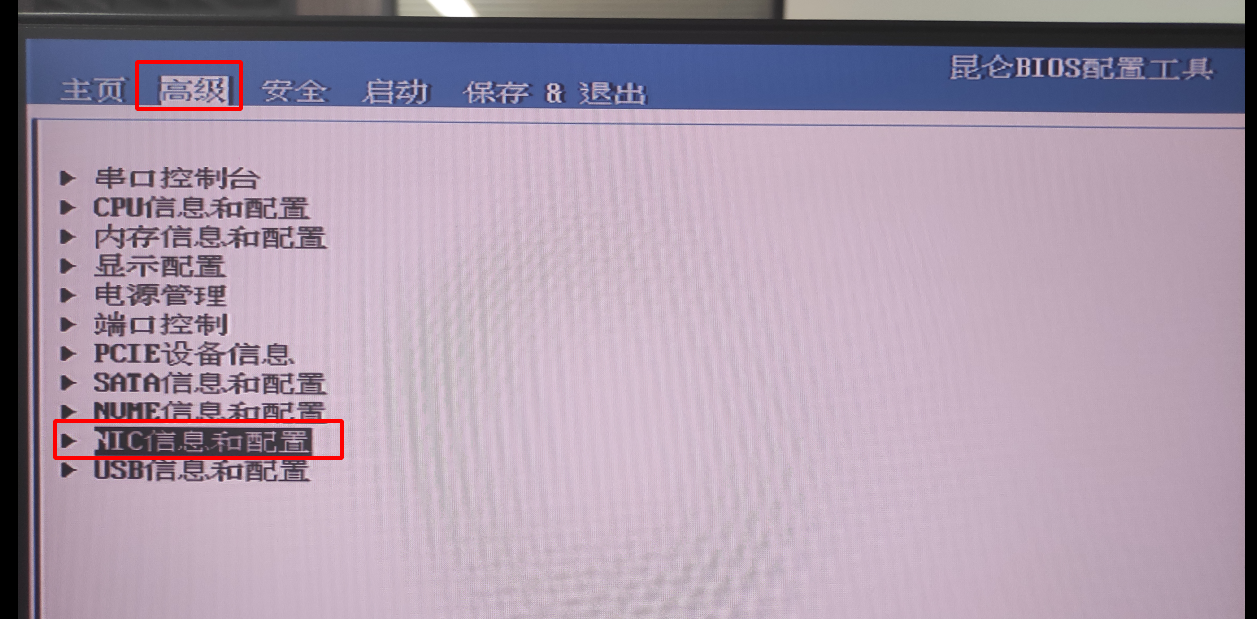
挂载 ISO 文件到 /mnt 目录
sudo mount Loongnix-server-8.4.0-loongarch64-dvd1.iso /mnt
创建PXE启动文件目录
mkdir -p /home/pxe/loongnix-server-8.4
拷贝 ISO 中所有文件到 PXE 启动目录(包括隐藏文件)
注意:根据需要修改目录文件的权限,确保其他机器可以正常下载文件。
cp -a /mnt/. /home/pxe/loongnix-server-8.4
在 /home/pxe/loongnix-server-8.4 目录下新建一个 ksdir 文件夹,然后根据第5章 ks 文件示例创建符合自己要求的 ks 文件,放置到 /home/pxe/loongnix-server-8.4/ksdir 目录下。
mkdir /home/pxe/loongnix-server-8.4/ksdir
安装TFTP服务
root# yum install xinetd tftp-server tftp
增加配置文件 /etc/xinetd.d/tftp,内容参考如下:
service tftp{ socket_type = dgram protocol = udp wait = yes user = root server = /usr/sbin/in.tftpd server_args = -s /home/pxe/loongnix-server-8.4 -c -v disable = no per_source = 11 cps = 100 2 flags = IPv4}安装DHCP服务
root# yum install dhcp-server
增加配置文件 /etc/dhcp/dhcpd.conf,内容参考如下:
#/etc/dhcp/dhcpd.conf 中的参考配置如下:option domain-name "loongnix.org"; default-lease-time 600;max-lease-time 7200;subnet 192.168.10.0 netmask 255.255.255.0 { ignore-client-uids on; next-server 192.168.10.1; #指向TFTP服务器地址 filename "EFI/BOOT/BOOTLOONGARCH.EFI"; #指向TFTP服务器上EFI文件位置 range 192.168.10.10 192.168.10.20; option routers 192.168.10.1;}安装HTTP服务
root# yum install httpd
配置HTTP服务
(1)方法1
修改 httpd 配置文件 /etc/httpd/conf/httpd.conf 的 DocumentRoot 和 Directory 信息(默认目录为 /var/www/html,修改为: /home/pxe):
## DocumentRoot: The directory out of which you will serve your# documents. By default, all requests are taken from this directory, but# symbolic links and aliases may be used to point to other locations.#DocumentRoot "/home/pxe"## Relax access to content within /var/www.# AllowOverride None # Allow open access: Require all granted# Further relax access to the default document root:
(2)方法2
rm /var/www/htmlln -svf /home/pxe /var/www/html
上面安装完成后,需要将主机 IP 配置为内网 IP,如上面设置的 192.168.10.1。需根据实际情况修改网卡名称
[loongson@bogon ~]$ sudo nmcli connection add con-name wire-3 type ethernet ifname enp3s0 ip4 192.168.10.1/24[sudo] loongson 的密码:连接 "wire-3" (7cc4ec31-00e8-483d-8d24-f8aa04e4b638) 已成功添加。[loongson@bogon ~]$ sudo nmcli connection show
启动DHCP服务
root# systemctl start dhcpd
启动TFTP服务
root# systemctl start xinetd
注意:使用 tftp 进行验证,确保 TFTP 服务正常可用!
启动HTTP服务
root# systemctl start httpd
注意:使用网页进行验证,确保 HTTP 服务正常可用!
关闭系统防火墙(或者配置相关规则)
root# systemctl stop firewalld
grub.cfg 放入 /home/pxe/loongnix-server-8.4/EFI/BOOT/下(将之前已存在的grub.cfg覆盖),grub.cfg参考配置内容如下:
注意:此处引用了 ks 配置文件,完成自动化安装。
set default="0"set timeout=60search --no-floppy --set=root -l 'Loongnix-server-8.4-8.4.0'echo -e "\nWelcome to Loongnix server 8.4.0 (loongarch64) Installer\n"menuentry 'Install Loongnix-Server Linux 8.4.0 (PXE)' --class fedora --class gnu-linux --class gnu --class os { echo 'Loading kernel ...' linux images/pxeboot/vmlinuz ip=dhcp ks=http://192.168.10.1/loongnix-server-8.4/ksdir/loongnix-server-8.4.ks inst.repo=http://192.168.10.1/loongnix-server-8.4/ echo 'Loading initrd ...' initrd images/pxeboot/initrd.img}其中 inst.repo 后面的IP地址为 PXE 服务器的 IP 地址。
#version=RHEL8# System authorization informationauth --enableshadow --passalgo=sha512# Install OS instead of upgradeinstall# 设置网络启动urlurl --url="http://192.168.10.1/loongnix-server-8.4/AppStream"#创建reporepo --name="Appstream" --baseurl=http://192.168.10.1/loongnix-server-8.4/AppStreamrepo --name="BaseOS" --baseurl=http://192.168.10.1/loongnix-server-8.4/BaseOSrepo --name="epel" --baseurl=http://192.168.10.1/loongnix-server-8.4/epelrepo --name="PowerTools" --baseurl=http://192.168.10.1/loongnix-server-8.4/PowerTools# 许可证协议eula --agreed# 使用图形界面安装graphical# Run the Setup Agent on first bootfirstboot --enable#根据实际情况修改所使用的磁盘ignoredisk --only-use=sda# 键盘布局keyboard --vckeymap=us --xlayouts='us'# 系统语言lang zh_CN.UTF-8# 网络设置network --bootproto=dhcp --device=eth0 --ipv6=auto --activatenetwork --hostname=loongson# Reboot after installation#安装完成后重启系统reboot# 时区设置timezone Asia/Shanghai --isUtc --nontp# 创建root用户并设置密码为loongsonrootpw --plaintext loongson# 系统服务设置,selinux和防火墙设置为disableselinux --disabledfirewall --disabled# System bootloader configuration# bootloader --append="net.ifnames=0" --location=mbr --boot-drive=sdaclearpart --allautopart# Partition clearing information #可根据实际情况修改所需的软件环境%packages@core@standard@network-tools# Disable boot optiosn "rhgb quiet"# Note: The installer will add the bootloader arguments "rhgb quiet" if plymouth# is installed on the target system. You can disable these options with -plymouth# in the %packages section.i-plymouth-plymouth-plugin-two-step-plymouth-system-theme-plymouth-theme-charge@dial-up@anaconda-tools@base-x@input-methodskernel-modules-extra%end%addon com_redhat_kdump --disable --reserve-mb='auto'%end
将待安装系统的机器与搭建 PXE 服务的机器连接在同一局域网内。
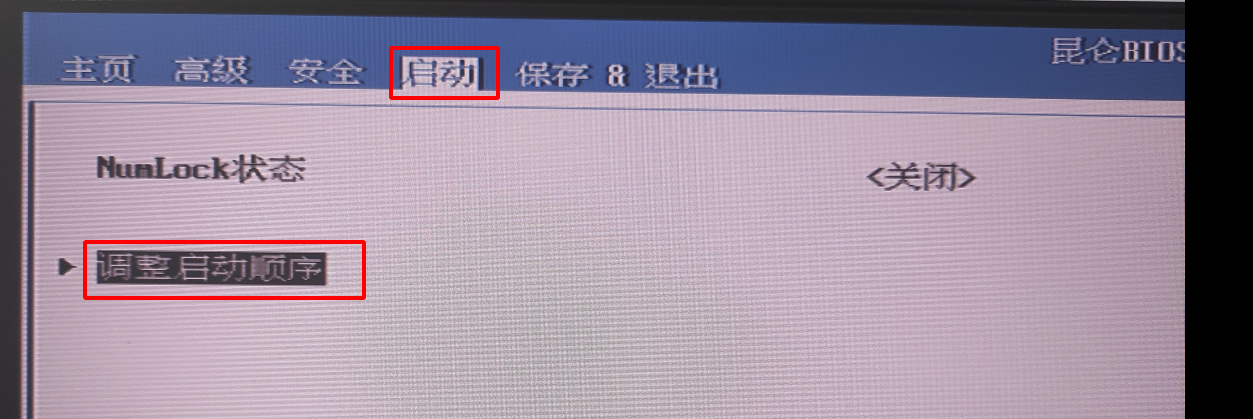
设置机器开机启动顺序为网络优先。如下图:昆仑 BIOS 启动后默认先从PXE启动,此时只需要开机即可,无需其他操作。

安装完成后,要断开机器的 PXE 环境,否则重启之后还是优先从 PXE 启动,继续执行安装系统的步骤!
 返回列表
返回列表